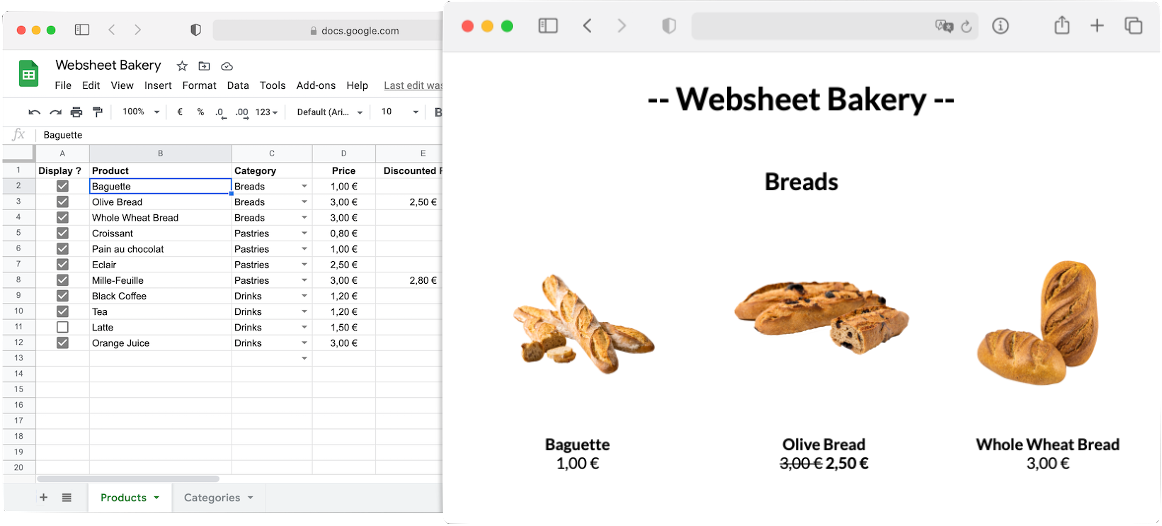
Render website sections with lazy-loaded data from Google Spreadsheets
It's lightweight (6 Ko), fast, free and open-source !
Scroll to discover

Create a new Google Spreadsheet including a header row (that will be used as your column names), and your data. You can use any cell format (dates, currencies, checkboxes, ...), even with URLs (links or photos), that will be rendered in your HTML.
After that, click on Share. In the Get link section, click on Change to anyone with the link to allow public read access to your spreadsheet. Then, copy the spreadsheet link.
Import websheet.js before </body>, name the data source and provide the spreadsheet link and tab name. You can declare as many data sources as you want, using websheet function multiple times.
<script src="//cdn.jsdelivr.net/gh/pierreavn/websheetjs/dist/websheet.min.js"></script>
<script>
  websheet('products', {  // <-- data source name

    // URL of the spreadsheet
    url: 'https://docs.google.com/spreadsheets/d/.../edit',

    // Spreadsheet tab name
    sheet: 'Products',

  })
</script>
Use data sources anywhere in the HTML page to render spreadsheets rows. And that's it!
Read the documentation to learn how to use filters, templates, events, loaders, etc.
<!-- Block below is duplicated for each row of data source "products" -->
<div data-websheet="products">

    <!-- Display only if checkbox is True -->
    <div data-websheet-if="Display ?">

        <!-- Display "Product" column value -->
        <div data-websheet-text="Product"></div>

        <!-- Bind "Picture" column value to src attribute -->
        <img data-websheet-bind:src="Picture" />

    </div>

</div>